[ad_1]
If you’ve been using an Apple Silicon Mac with an external display for photo and video editing, you may have noticed a few issues. Whether it’s ultra-wide monitors not displaying correctly, calibration software not working right, or high-end monitors displaying in YCrCb mode instead of RGB, Apple Silicon still has a bunch of issues with color-accurate monitors.
For over six months, I’ve been using the Apple M1 Mac mini as my daily driver for everything from day-to-day writing work, to content consumption, to evaluating the high-end color-accurate displays that I review here on PetaPixel. For the most part, the M1 mini has been fantastic: a boon for performance, whisper-quiet, and shockingly fast even when using Intel-optimized apps through Rosetta 2. But there’s one area where Apple Silicon is still a huge pain for creators: color-accurate monitors.
Something about the way the M1 chip communicates with an external display has changed, leaving monitor makers and color calibration companies scrambling to release firmware and software updates to address compatibility issues.
In our testing here on PetaPixel, we’ve run into three major issues, each of which required a different workaround:
- Messed up display resolution and scaling
- No way to calibrate the display
- Monitor defaults to YCrCb instead of RGB
Fortunately, some of these issues have been partially addressed by software and hardware manufacturers, but others still seem to crop up constantly. If you’re using an M1 Mac, be aware that you may not be getting the full performance out of your fancy (and expensive) photo editing monitor.
Display Resolution and Scaling

One of the earliest issues with M1 Macs and external displays was the computers’ incompatibility with ultra-wide and super ultra-wide monitors. Apple confirmed the issue and said that a fix was coming way back in December in a support document that has since disappeared, which presumably means that this issue should be fixed in the latest version of macOS, but some users are still reporting issues.
How to Fix Display Resolution and Scaling Problems on M1 Macs
If you hooked up your nice 5K2K ultra-wide monitor to the M1 Mac and found that it was maxing out at less than 5120 x 1440 resolution, here are three steps you should follow:
- Update to the latest version of macOS, that’s macOS Big Sur 11.6 as of this writing.
- Connect to the display using one of the Thunderbolt ports, and ensure the cable you’re using carries a DisplayPort 1.4 signal (not 1.2)
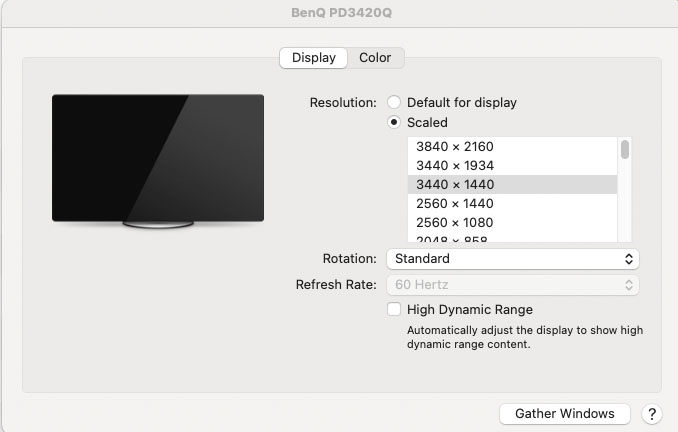
- If the resolution is still wrong, go into your Display option, hold the Option button, and then click on “Scaled.” Additional resolution options should appear.
If you’re still having issues after all of this, YouTuber Luis Brian Avalos suggests buying a Thunderbolt 3 dock. Apparently, this has worked for him where other solutions haven’t, but spending an extra $200 to $300 dollars should definitely be your last resort. If you’re connecting the monitor through the appropriate port and using the appropriate cable, the full resolution should be available to you.
This is an odd one because I personally haven’t had any problems with resolution. When reviewing the 40-inch ultra-wide Dell U4021QW, resolution worked properly right away and I had all the options I needed. However, fellow reviewer David Crewe did run into some weird issues when he first hooked up the BenQ PD3420Q, and others have reported similar problems. So make sure you’re on the latest version of macOS, use an appropriate cable, check your Display settings and, if all else fails, invest in a Thunderbolt 3 dock.
Calibration Issues
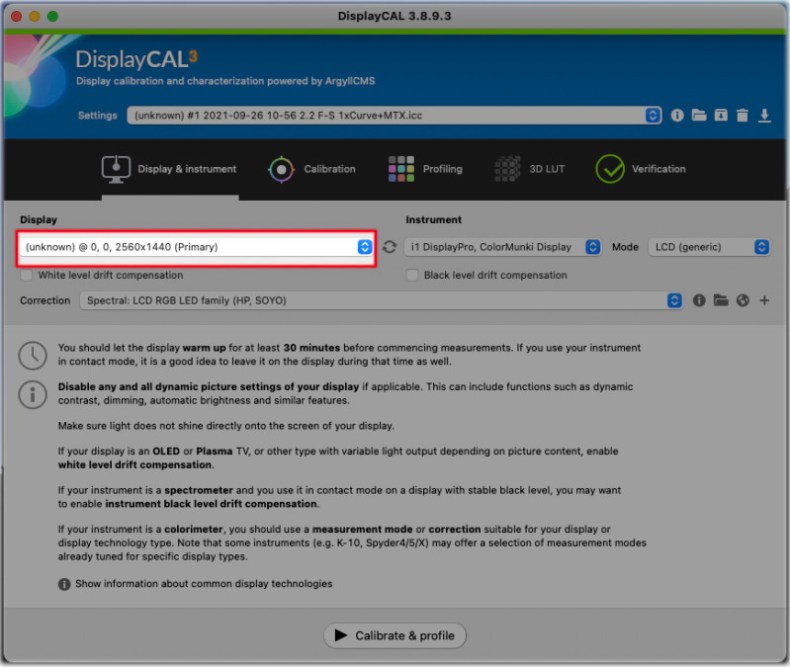

The most obvious issue you’ve probably already run into when using an M1 Mac with a color-accurate monitor is calibration. Up until the end of April, it was basically impossible to calibrate a monitor while it was hooked up to an M1 Mac, no matter what software you used. Based on our research, the issue has to do with some required security drivers that basically made it impossible for profiling software like XRite’s iProfiler and DataColor’s SpyderX to detect a connected display.
How to Fix Monitor Calibration Problems on M1 Macs
Fortunately, this problem has been largely fixed by the big guys: XRite released an M1 compatible version of iProfiler in April, and DataColor followed suit in mid-June with updated versions of the SpyderX Elite and SpyderX Pro software.
Unfortunately, the issue hasn’t been totally resolved by everybody. This change to Apple Silicon has made it even harder for monitor makers to release Mac-compatible versions of hardware calibration software. Even when there is a Mac version available, it probably hasn’t been updated to work with M1. This is what happened to PetaPixel reviewer David Crewe last month when he tried using ASUS’ ProArt Calibration software to hardware calibrate a new display he purchased for personal use:
If hardware calibration is a must for your workflow, do your research and make sure the manufacturer’s software is compatible with M1. BenQ, for example, has released an updated version of its Palette Master Element software that should work, but they’re the exception, not the rule. Most monitor makers either don’t have a Mac version at all, or they haven’t released one that’s compatible with both Intel and Apple Silicon.
Wrong Pixel Encoding, Bit Depth, etc.


Perhaps the most persistent problem I’ve run into while reviewing displays with the M1 Mac mini has been the computer’s tendency to “recognize” the display as a television, choosing to encode the pixels as chroma sub-sampled YCrCb instead of full RGB. When I reviewed the ASUS ProArt PA32UCG, this extended to bit depth as well: the monitor defaulted to 8 bits per channel and 60Hz instead of 10-bit and 120Hz, with no option to change either in display settings.
That’s a real problem when you’re talking about a $5,000 HDR photo and video editing monitor.
How to Fix Wrong Pixel Encoding and Bit Depth Problems on M1 Macs
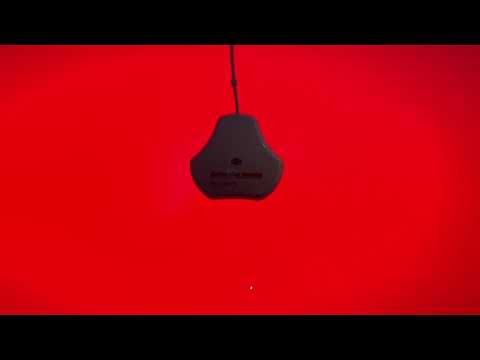
Thankfully, a work-around for this issue was posted on YouTube by Vladimir Kochkovski, and it’s been a god-send. In the video below he explains how you can go in and fix the YCrCb issue by changing the “Pixel Encoding” value in the .PLIST file that essentially identifies your display. This same technique is how I was able to change the ProArt PA32UCG from 60Hz to 120Hz, and make sure that it defaulted to 10-bit instead of 8-bit.
All of those settings are coded in the .PLIST file:

If you bought a high-end display and you’re using it with an M1 Mac, I highly recommend diving into the display’s on-screen settings to confirm that the monitor is running at full specifications. The last two monitors I’ve reviewed—the Dell UltraSharp U4021QW and the ASUS ProArt PA32UCG—were both running at sub-standard settings before I made the changes above.
Final Thoughts
With rumors swirling that a new pair of M1X MacBook Pros could be announced before the year is out, we sincerely hope that display issues like the ones above are resolved… and soon. Many professional photographers and video editors rely on Apple for their professional work, and those users simply can’t afford to switch over to Apple Silicon if they can’t get accurate color from their external displays.
My worry is that Apple’s focus on its own displays and display technology makes the company hesitant to work closely with other monitor makers like LG, Dell, Samsung, ASUS, EIZO, and Sharp/NEC. But if that’s truly the case, it’s a strategy that’s bound to backfire. Until and unless Apple unveils a wide range of color-accurate monitors at a wide variety of price points, most creatives will choose to use other brands. And if those same users continue to have a crappy experience, they’re far more likely to switch to a PC.
In so many ways, Apple Silicon has knocked our socks off: delivering better performance, better efficiency, and better compatibility out of the box than any of us expected when the M1 was just a rumor. Come on Apple… don’t let us down now.
[ad_2]
Source link
